

Picking the right abrasive disc for metal fabrication isn’t just about getting the job done; it’s about doing it safely and efficiently. Using the wrong disc can lead to a whole heap of problems, from poor finishes and wasted time to serious safety risks. This guide will walk you through how to choose wisely and keep things running smoothly, with a special eye on abrasive disc safety in the UK.
Key Takeaways
- Choosing the correct abrasive disc is vital for weld quality, fabrication speed, operator safety, and overall costs. Using the wrong one can cause overheating, bad finishes, and more rework.
- Different metals need different abrasives. For example, stainless steel requires iron-free discs to avoid contamination and rust, unlike standard carbon steel.
- Always match the abrasive disc’s speed and size rating to your tool. Exceeding these limits can lead to disc failure and injury.
- Proper mounting and a quick tool jog before cutting or grinding help prevent the disc from binding or breaking, reducing the risk of kickback.
- Investing in higher-quality, performance-driven abrasives often saves money in the long run through longer life, faster work, and less downtime, even if they cost more initially.
Understanding Abrasive Disc Selection For Metal Fabrication
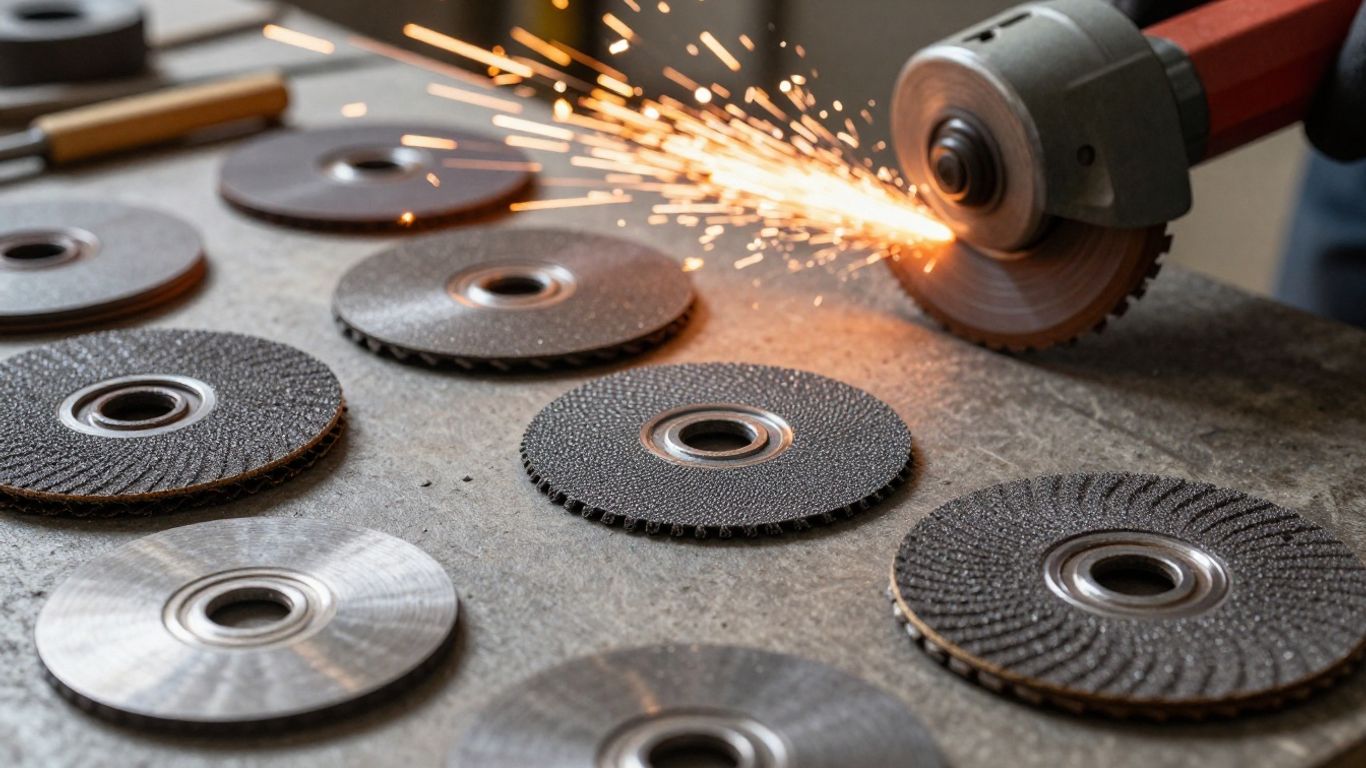
Choosing the right abrasive disc is a bit like picking the right tool for a specific job – you wouldn’t use a hammer to screw in a bolt, would you? In metal fabrication, getting this wrong can lead to all sorts of headaches, from poor weld quality and surface finishes to discs wearing out way too quickly. It really does make a difference to how smoothly things run.
Key Factors In Abrasive Disc Selection
When you’re looking at abrasive discs, there are a few things to keep in mind. It’s not just about grabbing the cheapest option off the shelf. You need to think about what you’re actually doing with it.
- Material Compatibility: This is a big one. You can’t just use any disc on any metal. For instance, working with stainless steel means you need discs that are iron-free. If you don’t, you risk contaminating the surface, which can lead to rust later on. For general carbon steel work, standard aluminium oxide discs are usually a good bet.
- Grit Size: Think of grit like sandpaper. A coarser grit removes material faster, which is great for heavy stock removal or initial grinding. Finer grits are for blending, cleaning up welds, and getting a smoother finish. Using a grit that’s too coarse for finishing can actually weaken the material or leave a rough surface that needs more work.
- Disc Structure and Bond: The way a disc is made matters too. Some have a more open structure to prevent clogging, especially when working with softer metals. The bond holding the abrasive grains together also plays a role in how the disc performs and how long it lasts.
The wrong abrasive disc can cause more problems than it solves, leading to wasted time, increased material waste, and a less-than-perfect final product.
Material-Specific Abrasive Disc Requirements
Different metals behave differently, and they need different tools. Getting this right saves a lot of hassle.
- Carbon Steel: Generally, aluminium oxide or zirconia alumina discs work well here. They offer a good balance of durability and cost for most carbon steel applications, from cutting to grinding.
- Stainless Steel: This is where you need to be careful. Always opt for discs specifically designed for stainless steel. These are usually iron-free to prevent contamination and subsequent corrosion. Using a standard disc on stainless steel can ruin the finish and compromise its integrity.
- Non-Ferrous Metals (e.g., Aluminium, Brass): Silicon carbide abrasives are often the go-to for these materials. They tend to cut cooler and are less likely to load up with material compared to other types.
Grit Size And Disc Structure Considerations
Let’s break down grit and structure a bit more, as they really impact performance.
| Application | Recommended Grit Size | Disc Structure Considerations |
|---|---|---|
| Heavy Stock Removal | Coarse (e.g., 24-36) | Dense structure for aggressive material removal. |
| Weld Preparation/Beveling | Medium (e.g., 40-60) | Balanced structure for controlled material removal. |
| Weld Cleanup/Blending | Medium to Fine (e.g., 60-80) | Open structure to prevent loading and maintain cutting action. |
| Finishing/Surface Prep | Fine (e.g., 80-120+) | Open structure for a smooth, consistent finish. |
Remember, the ‘structure’ refers to how densely packed the abrasive grains are. An open structure means there’s more space between the grains, which helps prevent the disc from clogging up, especially when working with softer or ‘gummy’ metals. A dense structure packs the grains in tighter for maximum cutting power on harder materials.
Ensuring Abrasive Disc Safety In The UK
Right then, let’s talk about keeping safe when you’re using abrasive discs. It might seem obvious, but you’d be surprised how many people skip the important bits. We’re talking about metal fabrication here, so things can get pretty intense. Making sure you and anyone nearby stays out of harm’s way is top priority. It’s not just about following rules; it’s about coming home in one piece at the end of the day.
Personal Protective Equipment For Abrasive Disc Use
First things first: PPE. This isn’t optional, it’s your first line of defence. You wouldn’t go into a boxing match without gloves, would you? Same idea here. You need to make sure you’ve got the right gear for the job.
- Eye Protection: Safety glasses with side shields are a minimum, but a full face shield is even better, especially when you’re dealing with sparks or flying debris.
- Hearing Protection: Those grinders can be loud. If you’re going to be using them for a while, ear defenders or earplugs are a must to protect your hearing long-term.
- Protective Clothing: Think sturdy, non-flammable clothing. Avoid anything loose that could get caught. A good leather apron can also offer extra protection from sparks.
- Gloves: Decent work gloves will protect your hands from cuts and abrasions, and also from heat.
- Respiratory Protection: Grinding creates dust. Depending on the material and the ventilation, you might need a dust mask or a respirator to avoid breathing in harmful particles.
Always check the specific requirements for the task and the materials you’re working with.
Adhering To Speed And Size Ratings
This is a big one that often gets overlooked. You’ve got to match the disc to the tool. It sounds simple, but using a disc that’s rated for a lower speed than your grinder can be a recipe for disaster. The disc could shatter, sending bits flying everywhere.
- RPM Matching: Always make sure the maximum RPM rating on the abrasive disc is equal to or higher than the maximum RPM of your grinder. You’ll find this information on the disc itself and on the tool.
- Disc Size: Use the correct size disc for your grinder. Don’t try to force a larger disc onto a smaller grinder, or vice versa. It needs to fit properly under the guard.
- Tool Guards: These are there for a reason! Make sure the guard is fitted correctly and is appropriate for the type of disc you’re using. Some cutting discs, for example, need specific ‘half-moon’ guards that cover more of the disc.
Using a disc that’s not rated for your tool’s speed is like playing Russian roulette with a power tool. It’s just not worth the risk.
Correct Mounting And Tool Jogging Procedures
Getting the disc on the tool properly is just as important as the disc itself. A poorly mounted disc can wobble, vibrate excessively, and even break apart.
- Mounting: Always ensure the disc is mounted flat against the flange, not at an angle. Use the correct flanges and ensure they are clean. If you’re changing discs, make sure the tool is unplugged first – no exceptions.
- Tool Jogging: Before you actually start cutting or grinding into your workpiece, give the tool a quick ‘jog’. Let it spin freely for about 30 seconds. This lets you check that the disc is running true and hasn’t got any hidden damage. If it sounds or looks wrong, stop immediately and check the mounting or the disc itself. This simple step can prevent nasty kickbacks or disc failure right at the start of a job.
Remember, safety isn’t just about the big, obvious stuff. It’s the little details, the checks you do every single time, that really make the difference in preventing accidents.
Optimising Metal Fabrication With The Right Abrasives
Choosing the right abrasive disc isn’t just about getting the job done; it’s about getting it done well, safely, and without unnecessary delays. Think of it like using the right tool for a specific task – a hammer isn’t much good for screwing in a bolt, is it? The same applies here. Using the wrong abrasive can lead to all sorts of headaches, from a finish that’s not quite right to discs that wear out way too quickly, meaning more stops, more changes, and more time lost.
Abrasives For Cutting And Material Separation
When you need to cut through metal, whether it’s a thick plate, a sturdy pipe, or a structural beam, the disc you pick makes a big difference. For precise cuts, you want a disc that’s designed for the job. Using a disc that’s too thick or too aggressive can lead to a rough edge, or worse, it might not cut cleanly at all. It’s important to match the disc’s diameter and thickness to your grinder’s capabilities. And remember, if you’re working with stainless steel, you really need to use discs specifically made for it. Standard discs can leave behind tiny bits of iron, which can cause rust and contamination down the line – not ideal for quality work.
- Match disc specifications to your grinder.
- Use stainless steel-specific discs for stainless steel.
- Ensure the disc’s maximum RPM rating is higher than your grinder’s speed.
Joint Preparation And Weld Integrity
Getting the edges ready for welding is a stage where abrasives really earn their keep. Before you can lay down a good weld, you often need to clean off mill scale, rust, or old coatings. Abrasives help you create the right bevels, V-grooves, or consistent gaps needed for a strong weld. If this prep work isn’t done properly, you can end up with weld defects, which means more grinding, more rework, and potentially a weaker joint. It’s a bit like building a house – the foundation has to be solid.
Proper joint preparation using the correct abrasives is a critical step that directly impacts the strength and reliability of the final weld. Skipping or rushing this stage often leads to costly rework and compromises the integrity of the fabricated component.
Grinding, Weld Cleanup, And Finishing
After welding, there’s usually some cleanup to do. This might involve removing slag, spatter, or just smoothing out the weld bead so it blends in nicely. For removing heavier slag, a coarser grit grinding wheel can be effective. Then, for blending the weld toes and getting a smoother finish, flap discs are often the go-to. The final finishing stage is all about achieving the look and feel required for the job, whether it’s for aesthetic reasons or to prepare the surface for painting or coating. Using the right grit size here is key – too coarse and you might leave scratches, too fine and you might not remove enough material.
Here’s a quick look at what works for different stages:
- Heavy Cleanup/Slag Removal: Medium grit grinding wheels.
- Weld Blending/Contouring: Flap discs (consider ceramic or zirconia for tougher jobs).
- Surface Preparation for Coating: Fine grit flap discs or non-woven surface conditioning discs.
Evaluating The Long-Term Value Of Abrasive Discs
It’s easy to just grab the same old abrasive discs you’ve always used. They get the job done, right? Well, maybe. But have you ever stopped to think about what that’s really costing you in the long run? We’re talking about more than just the price tag on the box. It’s about how fast the job gets done, how many times you have to swap out a worn-out disc, and even how much effort your team has to put in. Choosing the right abrasive disc isn’t just about the immediate task; it’s a strategic decision that impacts your entire operation.
Cost Versus Performance Analysis
Think about it: a cheaper disc might save you a few quid upfront, but if it wears out twice as fast or takes twice as long to do the same job, you’re actually spending more. Your labour costs are a big part of this. If an operator is earning £25 an hour and a disc takes them an hour to finish a part, that’s a significant chunk of change. Now, imagine a slightly more expensive disc that lets them finish that same part in just 15 minutes. Suddenly, you’re getting four times as many parts done in the same amount of time, for a small increase in disc cost. That’s a win, isn’t it?
Here’s a quick way to look at it:
| Disc Type | Upfront Cost | Lifespan (Hours) | Parts per Hour | Labour Cost per Part | Total Cost per Part (Disc + Labour) |
|---|---|---|---|---|---|
| Standard Disc | £2.00 | 1 | 1 | £25.00 | £27.00 |
| High-Performance | £3.50 | 2 | 4 | £6.25 | £9.75 |
This table shows how a higher initial investment can lead to massive savings when you factor in how long the disc lasts and how quickly it works.
Reducing Downtime Through Proper Selection
Every minute a machine is stopped, or an operator is waiting for a tool change, is a minute of lost productivity. Worn-out discs mean more frequent stops. Discs that clog up or don’t cut efficiently mean more time spent wrestling with the material. Using the correct abrasive for the specific metal and task can dramatically extend the life of the disc and reduce the need for constant replacements. It’s about finding that sweet spot where the disc performs well, lasts a good amount of time, and doesn’t require excessive force from the operator.
When you select an abrasive disc, you’re not just buying a consumable. You’re investing in the speed of your workflow, the quality of your output, and the efficiency of your team. Overlooking this can lead to a cascade of small problems that add up to big delays and higher costs.
Impact On Productivity And Craftsmanship
Beyond just speed and cost, the right abrasive disc makes a difference in the final product. A disc that’s too aggressive can damage the material, requiring extra work to fix. Conversely, a disc that’s not aggressive enough will slow things down and might not give you the finish you need. For jobs where appearance matters, like visible welds or surfaces that will be painted, using the correct finishing discs means less time spent on post-processing and a better-looking end result. It allows your skilled fabricators to focus on the quality of their work, rather than fighting with inadequate tools.
Common Abrasive Disc Applications In Fabrication
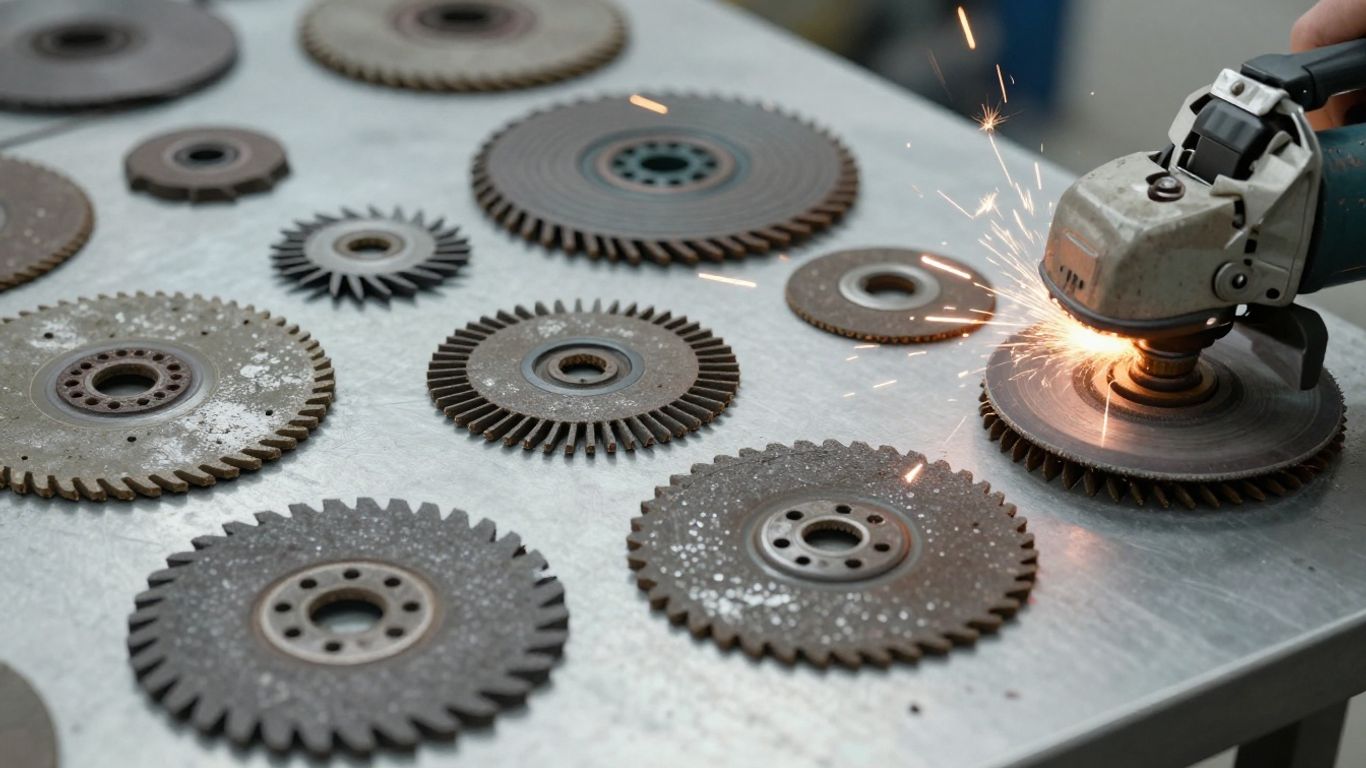
Right, so you’ve got your metal fabrication project, and you’re looking at all these different discs. It can be a bit much, can’t it? But picking the right one for the job makes a massive difference. Let’s break down what these common discs are actually used for.
Cutting Discs for Precision
These are your go-to for slicing through metal cleanly and accurately. Think pipes, sheet metal, or structural profiles. The key here is matching the disc’s speed rating to your grinder’s RPM and using the right type for the metal you’re cutting. Using a disc not designed for stainless steel on stainless steel, for instance, can lead to contamination and rust down the line. It’s all about getting a clean edge without making a mess.
- Material Separation: Cutting pipes, bars, and sheet metal.
- Profile Cutting: Shaping structural steel and other profiles.
- Precision Cuts: Achieving accurate lengths and shapes.
Flap Discs for Blending and Contouring
Flap discs are pretty clever. They’re basically a bunch of abrasive flaps glued onto a backing. This means they can grind and sand at the same time, which is brilliant for tidying up welds. You can use them to smooth down a rough weld seam, blend edges, or even shape a piece of metal. They give a much smoother finish than a standard grinding wheel, which is handy.
Using flap discs for weld preparation, like creating bevels for a strong joint, is a smart move. It helps ensure the weld will be solid and pass inspection.
- Weld Blending: Smoothing down weld beads.
- Edge Deburring: Removing sharp edges after cutting.
- Contouring: Shaping metal surfaces.
Surface Conditioning for Final Finishes
Once the main work is done, you often need to get things looking nice. That’s where surface conditioning discs come in. They’re not for heavy-duty grinding; they’re more for cleaning up surfaces, removing light oxidation, or getting a uniform brushed look. They’re great for preparing metal before painting or coating, making sure everything adheres properly. You can get them in different grits, so you can go from a rougher finish to a really fine one.
- Surface Preparation: Cleaning and preparing for coatings.
- Light Deburring: Removing minor imperfections.
- Uniform Finishes: Achieving a consistent look across the surface.
Abrasive discs are super useful in fabrication for all sorts of jobs. Whether you’re cleaning up metal, shaping parts, or getting surfaces ready for welding, these discs make the work quicker and easier. They’re a go-to tool for many tasks. Want to see the full range of tools we offer to help with your fabrication projects? Visit our website today!
Wrapping Up: The Right Disc for the Job
So, there you have it. Picking the right abrasive disc might seem like a small detail in the grand scheme of metal fabrication, but honestly, it makes a big difference. Getting it wrong means more time spent fixing mistakes, changing discs too often, and generally slowing everything down. Stick to matching the disc to the metal you’re working on, the job you need to do, and always keep an eye on safety. It’s not rocket science, but it does pay to be a bit thoughtful about it. Choosing wisely means less hassle, better results, and ultimately, keeping your workshop running smoothly without those annoying, costly pauses.
Frequently Asked Questions
What are the main things to think about when picking an abrasive disc for metal work?
When choosing an abrasive disc, you need to think about what kind of metal you’re working with, what job you need to do (like cutting or grinding), how fast the tool spins, and how smooth you want the final surface to be. Using the wrong disc can slow you down or even damage your work.
Can I use the same cutting disc for regular steel and stainless steel?
No, it’s best not to. Stainless steel needs special discs that don’t have iron in them. This is to stop the steel from getting rusty or damaged. Regular steel discs can leave bits behind that cause problems with stainless steel.
Why is it important to match the disc’s speed rating to the grinder’s speed?
Matching the speed is super important for safety. If the disc spins faster than it’s designed for, it can break apart and send pieces flying, which could cause a serious injury. Always make sure the disc’s maximum speed (RPM) is higher than your tool’s speed.
How do I make sure I’m using abrasive discs safely?
Safety comes first! Always wear the right protective gear like safety glasses, gloves, and ear defenders. Make sure the disc is put on correctly, check that the tool’s speed is suitable for the disc, and never force the tool. It’s also a good idea to let the tool spin up for a bit before you start cutting or grinding.
What’s the difference between a cutting disc and a grinding disc?
Cutting discs are thin and designed to slice through metal quickly, leaving a clean edge. Grinding discs are thicker and used to shape metal, remove material, or clean up welds. They remove metal by grinding it away.
Does spending more on a better abrasive disc really save money?
Often, yes! While expensive discs cost more to buy, they usually last much longer and cut faster. This means you change them less often, use less power, and get the job done quicker. When you add up the time saved and fewer replacements, the more expensive disc can actually be cheaper in the long run.


